Issue #695 - Sunday, August 17, 2025 Hey grower! In today's issue... - Learn the Earth-friendly path of No Till! Many growers ask us what to do with their old soil. If you learn the no-till method, the answer is grow with it again! If that sounds appealing, you're gonna love this short
article!
- Week 1 Adventure: "Sweet Dreams" Photoperiod Seedlings - See pictures of the ups and downs of week 1, including two very unusual seedlings.
- Grower Spotlight: Giants Spotted! I feel like all you outdoor growers with monstrous plants have decided to brag by sending in pics. Well guess what? We love it!
Nebula Haze & Sirius Fourside
Co-Founders,
GrowWeedEasy.com
"The time you enjoy wasting is not wasted time." ~ Bertrand Russell No-Till Soil Cannabis Grow Guide by WeedyPests (forward by Nebula Haze) Check out the full article
here. Have you heard of “no-till” organic cannabis growing? What is it, and is it a good choice for growing cannabis? Is it better than simpler organic methods like growing in “just add water” super soil? Today, I’ll share a tutorial that was submitted to
GrowWeedEasy.com by the grower WeedyPests. I don’t grow with this method personally, but many growers seem to have success with it. What do you think about the “no-till” cannabis growing method from this no-till tutorial? Contact us and let us know! If you guys haven’t already tried a no-till grow, I would highly recommend trying and documenting it. The main information I’m finding on organic growing on GrowWeedEasy.com is about super soil, which is an organic grow style, but uses a fundamentally different concept compared to no-till. Let me try giving a basic rundown on the differences. Super Soil gets discarded and
replaced for the next grow With Super Soil, you are providing many hot ingredients integrated into the bottom layer of your container to provide all of the nutrients needed for the entire grow, after which, the soil is discarded and replaced for the next grow. With “Super Soil” you add a layer of “hot” nutrient-rich composted soil to the bottom of your pot. Cannabis roots dip into this reservoir of nutrients throughout the
grow. After plants start growing, the only thing a grower adds is water. This is why it’s often called “Just add water” super soil. At the end of grow, the soil gets thrown away and is replaced to start the next grow. You guys already know this, having previous experience with super soil growing. In fact, super soil is more closer in concept to a traditional bottled nutes grow than no-till is. No-till soil gets re-used and built up over time, just like soil in nature No-till, on the other hand, tries to mimic nature as closely as possible. When following Coot’s Mix as a
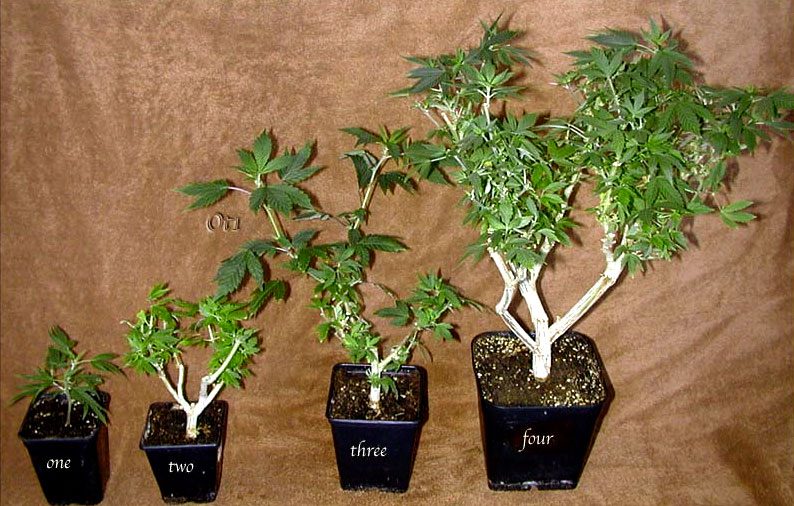
base for your no-till soil (which I recommend), you are adding no hot ingredients that tend to burn your plants. This means that you fill your entire container up with the no-till soil, and this also means that the same soil is good from seedling to maturity. With Coot’s Mix, you are indeed adding most, if not all, of the nutrients that you will need for the entire grow, just like with super soil, but unlike super soil, no-till (by its name) is meant to be
reused, and actually gets better over time the more you use it. Example of cannabis plants grown in a “No Till” soil setup with cover crops Ingredients for Coot’s No-Till Soil MixNote: Credit for this recipe goes to Clackamas Coots. This recipe makes 15 gallons (2 cubic feet) of soil. That is enough to fill about 3 x 5-gallon pots. Base: This will make up your base. Essentially, you want 1/3 of each of these in the base mix. - 5 gallons Compost
- 5 gallons Peat Moss
- 5 gallons Aeration
material (such as pumice stone, rice hulls, or lava rock)
Additional Inputs: - 1/2 cup Kelp Meal
- 1/2 cup Crustacean Meal (or bone meal)
Minerals - 1 cup Basalt
- 1 cup Glacial Rock Dust
- 1 cup Gypsum
- 1 cup Oyster Shell Flour
Basic Steps of a No-Till Grow1: Mix your soil according to Coot’s Mix using a high-quality compost and/or earthworm castings. Alternatively, you can get fantastic premade soils from sources like Build-A-Soil and KiS Organics (or if you’re in Canada, Black Swallow Soil sells KiS soil). You’re going to need enough soil to fill a minimum of 15-gallon containers per plant, with 25-30
gallons per plant being recommended. Fabric pots or raised beds are preferred.
2: Fill a red party cup with that soil mixture (no need to let it cook like with super soil, although it can’t hurt if you do), and cut a few holes on the bottom for drainage.
3: Add worms to your big container of no-till. This is vital to the continued life of your soil, as they will eat through decomposed material, including old plant roots (but not
living ones). The worms will also produce earthworm castings, which are a fantastic source of nutrients for your plants. If you do not have worms, it’s not really a no-till grow. Be sure to water your soil to keep the worms alive even though there are no plants in there yet.
4: Plant your seed/seedling (germination method is up to you) directly in the red party cup, digging about 1/4 in deep as you normally would with any medium. Be sure to sprinkle some myco
powder inside the hole before you drop the seed or seedling in. Myco is a beneficial fungus that attaches itself to plant roots and boosts its growth substantially.
5: Transplant. Once your seedling has sprouted and you feel it’s a good time to transplant, go ahead and transplant as normal; nothing different here when compared to any other type of grow.
6: Add a mulch layer directly after transplanting. I personally like barley
straw, as it’s cheap, feeds the worms, and is very lightweight. Some people also like to use a living mulch layer, like clovers for example. This is completely personal preference and there are pros and cons to both.
7: Use compost tea. When your plant seems to be getting hungry, make and feed a compost tea to stimulate the biology present in the soil. With no-till, you are feeding the soil, not the plants. If the compost tea doesn’t seem to be doing enough, you
can topdress with additional nutrients and minerals that you have leftover from mixing your Coot’s Mix soil. To topdress, sprinkle your nutrients about 1/4 in thick along the surface of the soil, work it into the first 1 in of the soil, then water it in.
8: Rinse and repeat step 7 until harvest. After harvest1: Cut plant at the base. To harvest, cut down the main stem level to the soil, and be sure to agitate the soil as little as possible (this IS called no-till, after all).
2: (Optional) Soil test. Optionally get a soil test done on your soil to know exactly what nutrients you need to add and to correct your pH as necessary (pH range is the same as regular
soil growing). Alternatively, you can just add some nutrients and minerals to your soil by topdressing and watering, as there’s no risk of burning your plants due to the lack of hot ingredients. I like to do a soil test after every 3 grows in the same soil.
3: Start another plant. It is beneficial to constantly have plants growing. Either cannabis and/or cover crops. You do not have to wait at all from harvest to plant a new plant. Plant the new plant about a
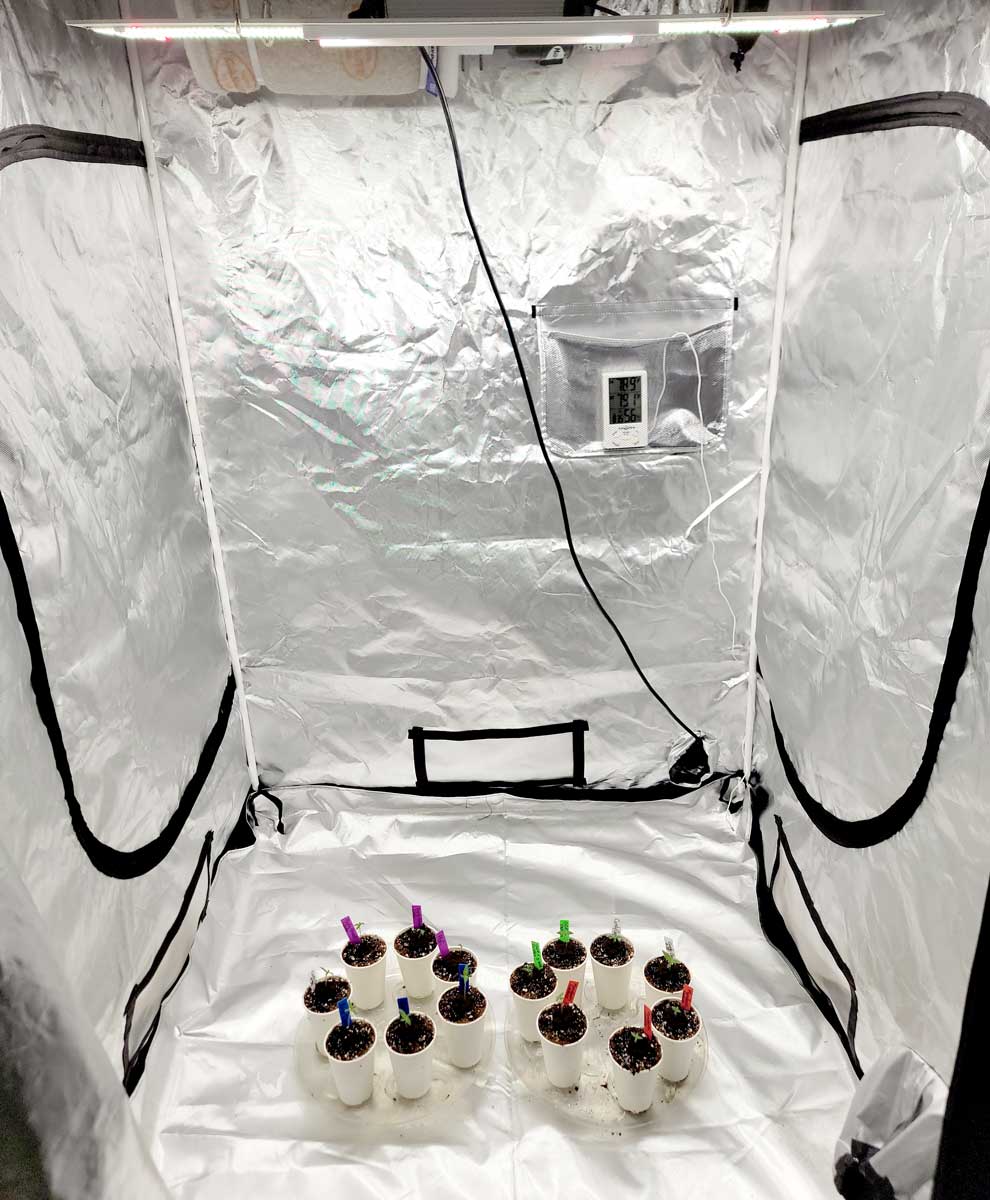
couple of inches away from the old main stem (eventually, the old plant’s roots will decompose enough that you can just twist and pull the old main stem out). Where to learn moreFor a fantastic community on the topic of no-till growing, check out /r/NoTillGrowery on Reddit. Week 1 Adventure: My "Sweet Dreams" Seedlings As the seedlings popped their heads above soil, it became clear that two of them were a little... different from the others. Want to See the Full Grow Journal Entry? Check out week 1 of the full in-progress grow journal. TONS of notes and pics for those interested in the day-by-day details. This week we did some transplanting! Check the full entry for step-by-step pictures. Seedlings in cups in the grow tent! Look closely! Can you see the odd ducks? It's been 7 days since I put the sprouted seeds in the Rapid Rooters. But two of the seedlings are a bit... unique. Click the picture to look closely at all the 7-day old seedlings. 1st unusual seedling: One seedling has something very wrong with it. (Hint: look at the number of leaves per seedling). If you zoom in on the bigger picture, one is clearly NOT like the others (or any normal seedling). Unfortunately, this seedling is
doomed... Learn what happened in the week 1 entry of the grow journal. 2nd unusual seedling: One seedling is a mutant. It's incredibly hard to see just yet. But the new leaves are growing in a different pattern from the others. Try to imagine what the view would look like from above. Think... clover 🍀 See close-up pictures in the week 1
entry, plus learn what happens next. I'm using Fox Farm soil nutrients with this schedule. Stay tuned for next week's update! ~Nebula
|
📸 Weekly Plant Spotlight:
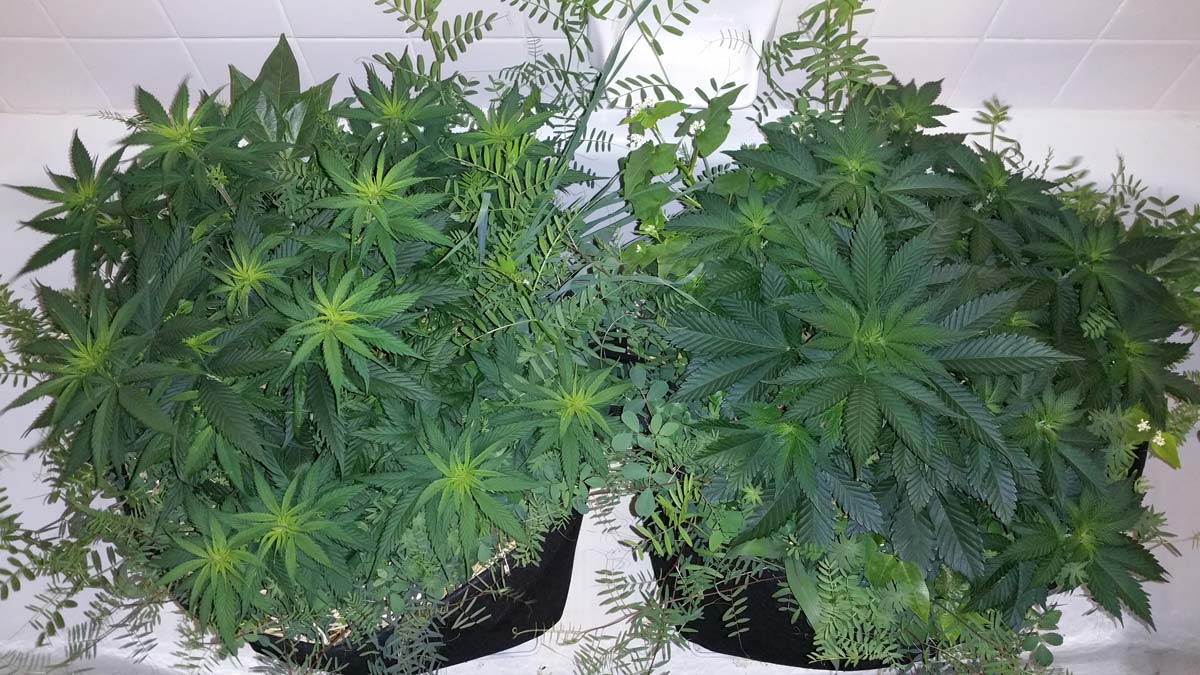
Giants Spotted!
|
|
"Strains are Acapulco gold amnesia haze and lemon skunk just wanted to share." ~Wesley Such a humble attitude for a man housing actual giants in this backyard 😂 Well done on these beautiful plants! ~Sirius
|
Recommended Cannabis Seed Sources
These sources have gotten great reviews from our readers:
- Seed Supreme – Florida, United States
- ILGM (I Love Growing Marijuana) – California, United States
- North Atlantic Seed Co. – Maine, United States
- Seedsman – Ships from US & Europe
- MSNL – Netherlands bank with shipping centers in the US, Canada, and
UK.
|
🌳 Check Out Our Grow Community!
|
|
|
Check out our friendly growing community to ask questions, discuss your grow, share pictures, or otherwise talk about growing cannabis with other real growers! Ask Questions & Talk with Other Growers! Please note: We let each person in manually, so please be patient after you request to join. We'll let you in as soon as possible!
|
Who Runs GrowWeedEasy.com?
|
|
|
Nebula Haze: When I first started growing, I struggled. Now, it is my mission to make it easy for new growers to get started while helping advanced growers get bigger, better yields with less time and money. We update/add articles every week. Anyone and everyone can grow if they want to! Current Favorite Strain:
Mandarin Cookies (learn more in my article about relaxing limonene) Learn which seed sources are recommended by Nebula Haze Sirius Fourside: Sirius Fourside is a hobbyist grower who has gained the bulk of his experience growing in water as a medium (deep water culture, bubbleponics). Copyright (c) 2025 GrowWeedEasy.com NOTE: If links aren't working or if pictures are not showing up properly, please view the full newsletter here: http://archive.aweber.com/gwe-updates Disclaimer: Grow Weed Easy only recommends products that we've either personally checked out ourselves, or that come from people we know and trust. For doing so, we may receive a commission. Nothing in this e-mail should be considered personalized Financial, Legal, or Medical Advice. The contributors to this magazine grow legally under their local laws but are not lawyers or medical professionals. Any decision to grow
marijuana should only be made after consulting with an experienced lawyer or other legal adviser. Any medical decisions should only be made after speaking with a doctor. Be safe! How Did I Sign Up For This Newsletter? Our records indicate that requested to be added to the GrowWeedEasy.com weekly newsletter at . Date: August 23, 2025
To unsubscribe, click here: https://www.aweber.com/z/r/?ThisIsATestEmail
|
|
|